I did a lot of Google and forum searches, but never found a complete DIY on the M3 Coolant Change. I have the Bentley manual that supposedly covers this model, but like all other sources, it says "Open the radiator drain plug" which does not exist on the M3.
I am by no means an expert, but this page is the sum of personal experience and forum discussions. Use this guide at your own risk. Read everything before starting and if you do not feel confident with everything, then seek help from a professional. I tried to make this as complete as possible, but after the fact, I see that some of my pictures did not come out as well as I hoped, and there were a few shots I failed to take.
Anyhow,
Hope this helps.
Questions or comments to
imabyter@yahoo.com
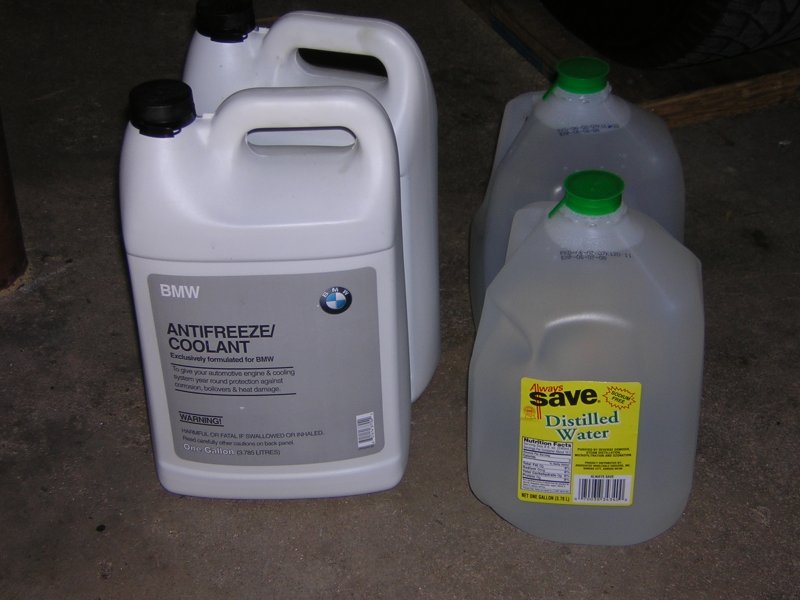
| What you need: System takes a total of 10 quarts of coolant. I only used about 8, so I have a full 50/50 mix bottle left. Use BMW coolant (about $9 a bottle), as it is phosphate free and will not corrode the aluminum parts of your engine. Raise the car and secure it with jackstands on the rubber jacking points provided on each side of the car under the doors. DO NOT get under your car supported only by a jack . Put a big layer of cardboard the width of the car and as far back as the firewall. This is one messy job! |
 |
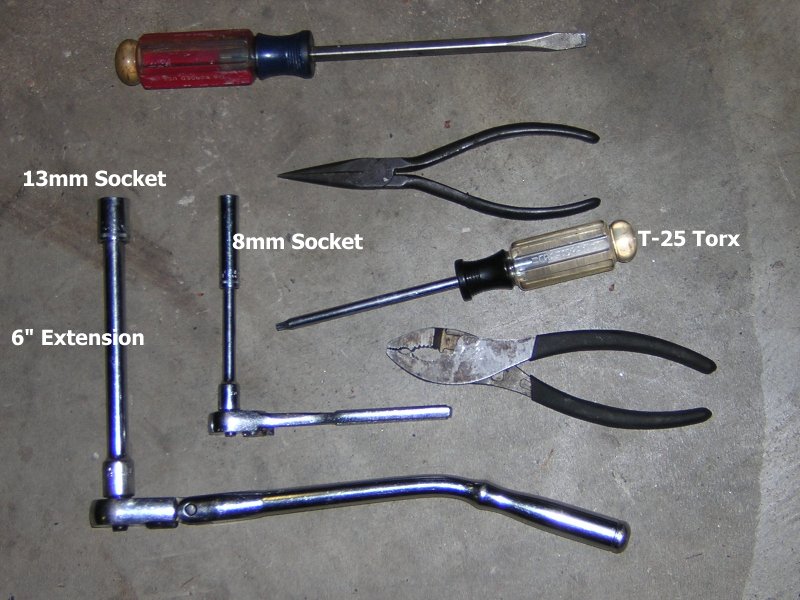
| The only tool that may not be in
every man's tool box is the T-25 Torx Driver, although if you want to
work on your M, you had better purchase a set of drivers and a set of
3/8" drive Torx Sockets. Use the 8mm socket to remove the splash shield under the engine. The Torx driver will take out the 2 side screw that hold the oil cooler up under the radiator. It is only necessary to remove the 2 side screws. Leave the couple screws along its length as they just hold the shroud in place. |
 |
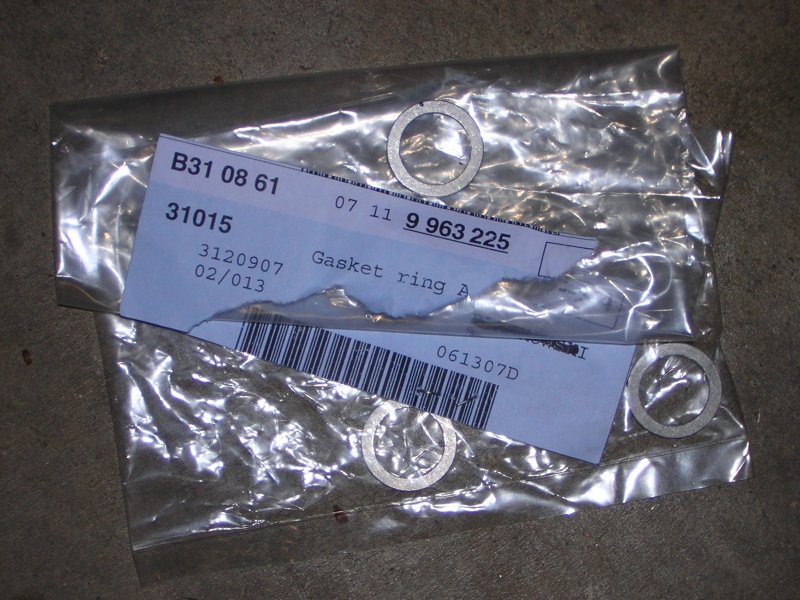
| You will need to acquire one of
these Crush Washers to replace when you reinstall the block drain
plug. Since they were like $.60 each, I ordered a couple extra to
have around. They are 14mm diameter, so you could probably find a
generic replacement at you local chain parts store. I chose to
wait and get them from BMW. They appear to be aluminum, and I was
paranoid about putting a copper crush washer on an aluminum block. Torque Spec on the drain plug is 18 ft-lbs. |
 |
| Turn on the ignition, and put
heat control to full heat. This will open the heater core and
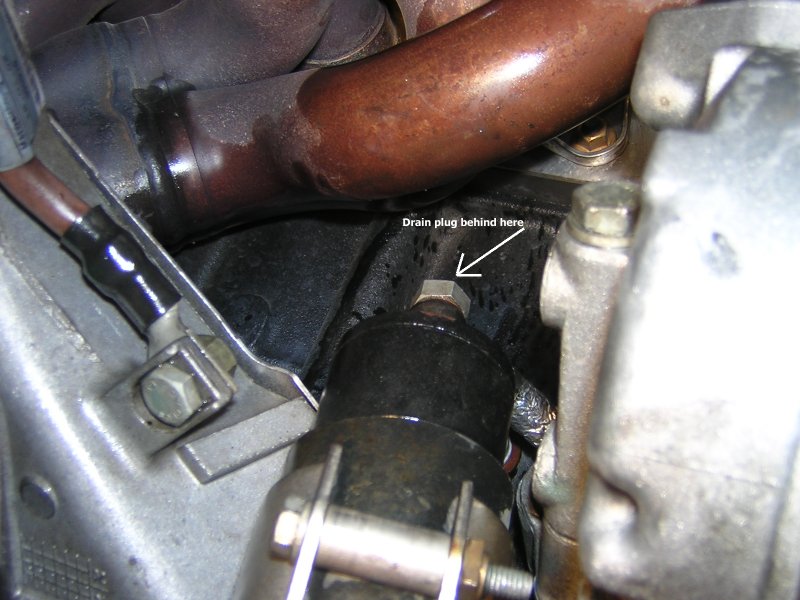
allow it to be drained. Turn off the ignition. Sorry, but the block drain plug is not visible from any position that I found. However, if you reach up in the area of the arrow in the picture, you can fit a 13mm socket on a 6" extension straight on to the plug. Just feel around and you will find it. WARNING: When this plug is removed coolant will go EVERYWHERE! I recommend a 2' x 3' shallow tub, like they sell for storing wrapping paper under the bed as a catch basin. Otherwise, use several of the largest diameter containers you can find. Remove the cover over the oil drain plug as a lot of coolant will spill there. Allow block to drain fully. |
 |
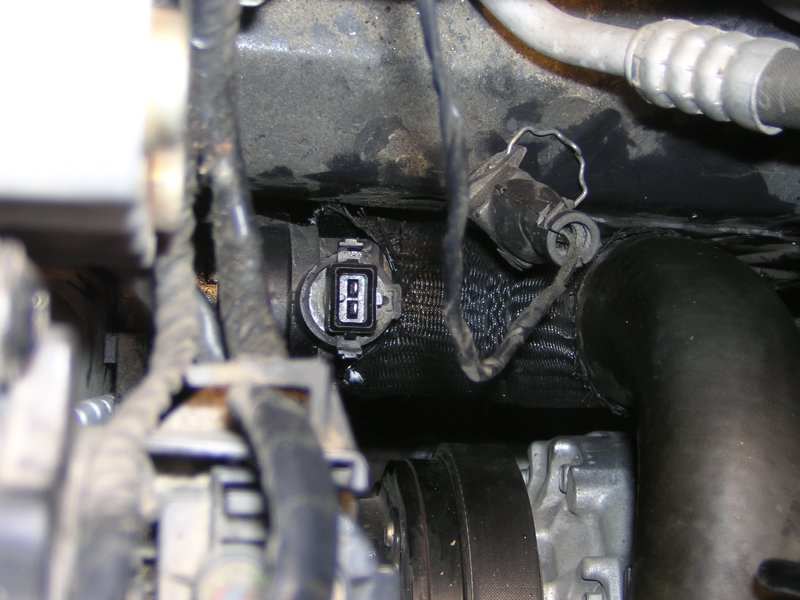
| Looking down on the lower hose
from above, pull the clip on the sensor connector and remove the plug
to get it out of your way. The wire clip just gets pried out with
the screwdriver. Push it back in place when reinstalling to lock
it. |
 |
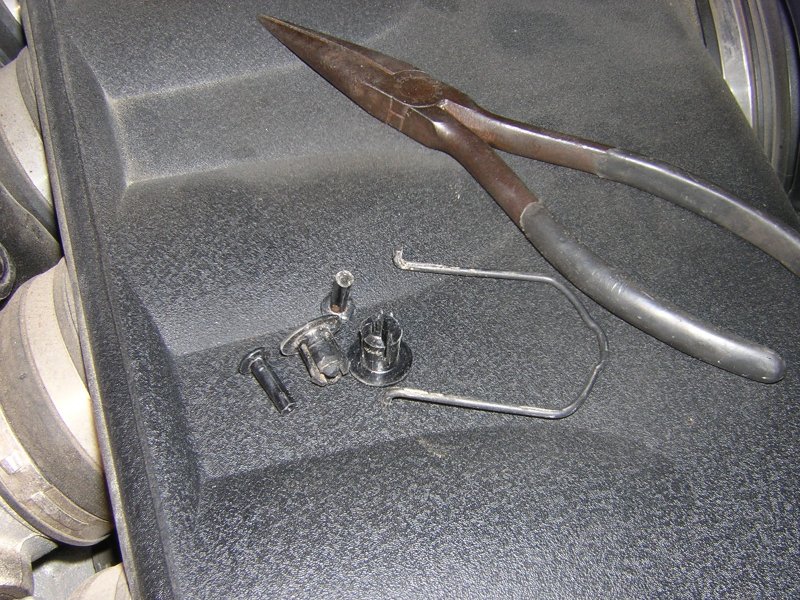
| I found it as much easier to
work with the shroud piece removed from the above the lower hose.
This picture shows the two quick connect fastners that hold the shroud
in place. The big metal clip you will remove from around the
lower hose where it connects to the neck of the radiator. The
pair of needlenose shown works well for both of these tasks (the
screwdriver may help as well). If you can't get hold of the clip,
approach it from below, and pry the bottom ears of the clip up with the
screwdriver until you can grab it from above. I could not get a
good picture, but this will all be pretty obvious once you get on your
back under the car. |
 |
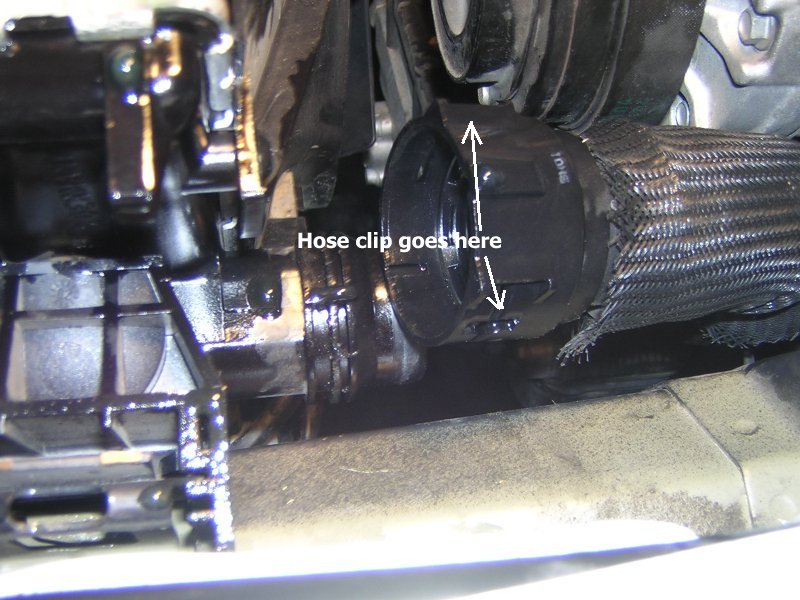
| Once you have the clip removed,
the lower hose can be disconnected. Sounds easy, bit it was a
real PITA. I wound up using a 2 foot screwdriver type prybar to
gently work around the neck of the hose. Once I got it loosened,
I was able to gradually work the hose from the neck. Again, once
the hose comes off, COOLANT WILL GO EVERYWHERE! Wear goggles,
have a nice sized container to catch the coolant in. Once all the colant is drained, reinstall the hose, clip, temp sensor, shroud, and if you are confident, the oil cooler and engine splash guard. |
 |
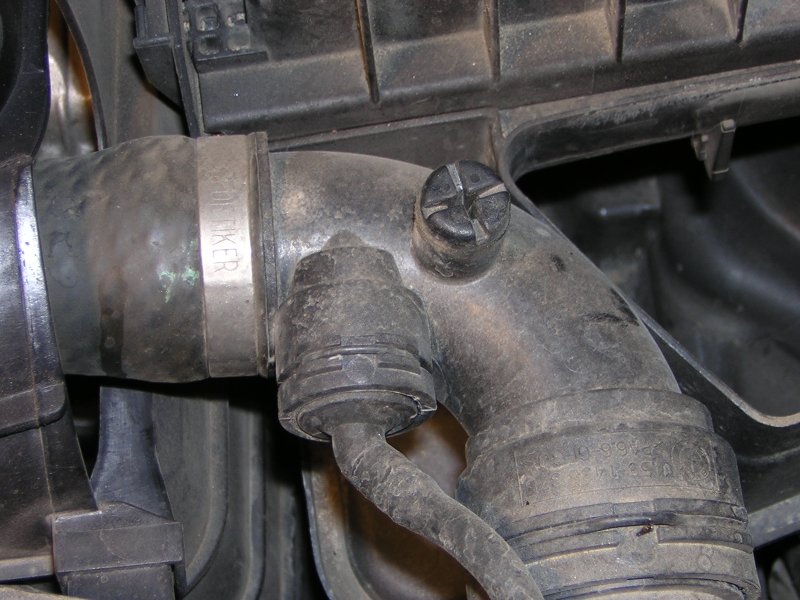
| You will need to remove the air
intake plumbing in order to get at the air bleed screw for the system. Once you have the lower hose back on and the block drain plug installed (18 ft-lb torque) you can refill the system. Use your 50/50 mix of distilled water and coolant . Remove the bleed screw completely. Now very SLOWLY add your coolant to the expansion tank (not pictured) on the right side of the engine. It will take about 2 gallons until fluid starts to flow from the bleeder. |
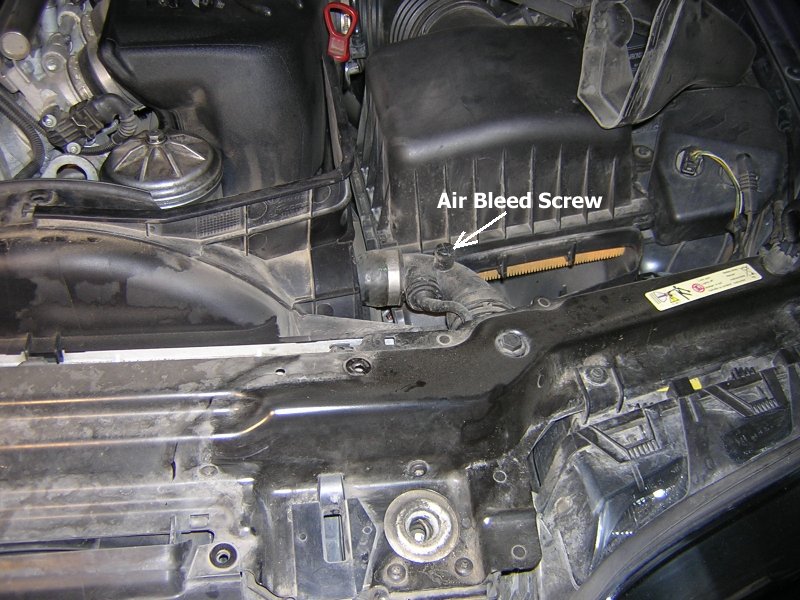 |
| Install the plug, loosely, then
get in the car and turn the key to 1
position. You should hear the heater pump moving coolant into the
system. After a few minutes turn off the key, then add more coolant
until it starts to seep from the bleed screw again. Tighten the
bleeder then
continue to add mix until the dipstick is level with the top of the
tank opening. Now that the system is full of coolant, start the car, and let it come to full operating temp. Shut it off and allow it to cool completely. Open the bleeder 1/2 way. If you get a hiss of air, repeat the heat and cool above, then check again. It will probably take 2 heat cycles to get all the air out. Put the air intake back together, (and any thing else you took apart that is still hanging) and you are set for another 2 years. |
 |